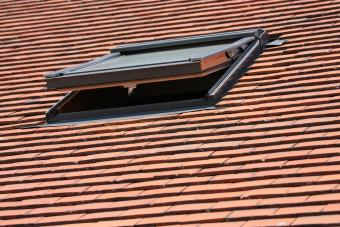
Skylights provide light and ambiance to rooms without taking away from valuable wall space. They're also a great way to bring in extra light to a new attic renovation. If you're planning on installing a skylight in your home, follow these tips to help ensure the process goes smoothly from start to finish.
Nine Tips for Installing Skylights
You don't have to be Bob Vila to install a skylight successfully; this is a job that takes only a moderate level of skill. It's important to pay attention to several areas and steps, however, to ensure you end up with a watertight window that doesn't leak.
Check with Your Building Inspector
Not every roof is going to successfully support a skylight. Truss roofs, for example, may require you to remove beams that would interfere with the roof's ability to bear the load. In other cases, you will have to double up the supports on either side of where you want the skylight to be placed before you can remove beams and make your first cut.
By checking with your building inspector, you'll find out where the best place to cut is, and whether or not it's safe to do so. You'll also find out if a permit is required in your town for this type of job.
Have Fall Protection
After you support the area below the roof for the skylight, the rest of the installation is going to take place on the roof itself, from measuring and cutting to the final caulking. Wear a fall protection harness attached to a rope and make sure you have someone on the other end to help support your weight.

Mark Your Corners from Below
To ensure you know exactly where to remove the shingles from the area you'll be cutting, find the corners of the window below the roof and drive a deck screw up through the roof at each corner. The screw will be visible on the roof itself, so you don't have to guess if where you're cutting is indeed in the section you supported from below.
Remove Extra Shingles
When you make your cut in the roof for the skylight, it's important to remove extra shingles from around the area. Plan on stripping off at least 7-inches of shingles past where the opening will be. This not only gives you plenty of room to cut, it also gives you plenty of space to install the flashing that will help keep your window watertight.
Snap Chalklines for Straightness
After you've measured and marked your four corners, ensure your lines are nice and straight by snapping chalklines between them. Stretch the chalkline tool between two screws and snap it against the roof. Cut along these lines for the most precise cuts.

Flash the Sill
Flashing is integral to a skylight, and is what helps keep it from leaking. Use a self-adhesive membrane to avoid nail holes, stretch it across the bottom first, then cut and bend it into the frame. Repeat on the other three sides.
Bring It up from Below
Have an assistant standing below you at all times. Have them lift the skylight to you through the cutout, rather than messing around with having to bring it with you up the ladder.

Seal the Edges
After you've nailed the flange of the skylight into place, attach flashing to the bottom flange, and make sure it extends about 6-inches out past the skylight on each side. This will cover the area you stripped of shingles earlier. It will also cover the nail holes you made to attach the flange.
Flash the Sides
Once the shingles are back in place and the sill has been attached below the skylight, take the time to apply flashing to all the sides of the skylight. Cover the flashing on the roof with shingles to help seal it all in. Snap counterflashing onto each side once the first layer of flashing is complete. Counterflashing is what will help keep the rain out even when the wind blows.
Consider a Flashing Kit
Flashing kits are available at most home improvement retailers. They contain all the necessary flashing for your skylight installation. Keep in mind if you choose to use one, however, that each type of flashing kit corresponds to one or two specific types of skylights or skylight installation methods. If you choose to use a kit, either purchase one recommended by your skylight's manufacturer or one that is designed for your specific installation method. You can find flashing kits at:
- Home Depot: Home Depot carries low and high-profile flashing kits for all types of skylight installation, including deck-mount and curb-mount.
- Lowe's: Lowe's also carries a wide variety of kits, most of them broken down by the specific type of skylight you are installing, including FX, FV and FVE.
Enjoy Your New Skylight
Putting in the skylight should take you about two hours start to finish. When you're done, you'll be able to sit back and enjoy the light streaming in from your new window. Take the time to apply all the layers of flashing around your skylight for best results.


