Knowing how to shingle a roof well can greatly reduce your home repair costs during an exterior home renovation. While installing metal roofing is beyond the abilities of most homeowners, installing asphalt shingles over an existing roof is a reasonable project for an experienced do-it-yourselfer.
Before Beginning
The success of your project will depend on the prep work you complete before installing a single shingle.
- Start by finding out how many layers of shingles are already on the roof of your home. If there is more than a single layer present, installing asphalt shingles over the existing roof may not be allowable by code.
- Buy the most expensive shingles you can afford. Asphalt shingles with a 50 year guarantee will protect your roof in case of natural disasters and are more cost effective over time.
- Clean the roof thoroughly and let it dry. Remove all mold, mildew and tree litter before new shingles are installed.
- Fix any leaks or loose shingles. Even if you are covering the existing roof with new shingles, leaks and loose shingles should still be fixed prior to installing new materials.
- Wait for a warm day. Installing asphalt shingles on a cool day is not recommended. Instead, place the boxes of shingles on the roof and allow them to warm up prior to installation. A warm shingle is less likely to crack and will conform to surrounding shingles when it is installed, creating a better roof.
Selecting Shingles and Materials
Estimating Number of Shingles
To evaluate how many shingles you will need, manufacturers will often provide charts, but the following formula will give you a general idea:
Roof Length x Width Divided by 100 + 10%.
Shingle sizes vary, so this is just a rough estimate.
Materials Needed
Shingles come in a number of styles and materials, and your specific application and budget will determine which type you choose. With one of the most common, asphalt shingles, the process is pretty straightforward and the materials listed below should handle most jobs:
- Measuring tape
- Chalk
- Nail gun (for larger projects)
- Staple gun
- Roofing nails
- Roofing hammer
- Chalk line
- Claw hammer
- Roofing knife
- Roofing cement
- Roofing felt (if you will be doing a complete installation)
- Roof ridge
The manufacturer's instructions for the type of shingle you're using will be an invaluable tool in determining the specific supplies, like nails and cement, which you'll need to complete a good install.
Replacing Damaged or Missing Shingles

Once you've located and matched a replacement shingle, remove the damaged shingle and its accompanying nails.
- Treat the shingle with roofing cement and position it in place.
- Nail it down using nails about 1/2 inch longer than the nails you removed, situating them so that the shingles on the previous row cover them completely. Use the same number of nails as were used on the old shingle.
- Dab roofing cement around the nail heads as a sealer for additional protection from moisture.
How to Shingle a Roof Over Existing Shingles
The key to completing this project with the best results is to take the time to complete each step well. Even the smallest gap can easily cause a leak that could lead to mold, mildew and extensive water damage.

- Start by installing the roofing felt. When installing roofing materials, always start from the bottom and work up towards the ridge. Install the roofing felt by laying it parallel to the roof ridge and securing it with short galvanized nails every eight inches. Every seam between different pieces of roofing felt should be overlapped by six inches, and secured with galvanized nails and roofing cement.
- Install the flashing. Flashing is important because most leaks occur around the flashing seams. Flashing should be installed anywhere there is an inverted corner on the roof. Flashing is secured with galvanized nails and roofing cement. In order to prevent flashing leaks, visualize where the water will run when it contacts the roof. If there are any gaps or seams that are overlapped in the wrong dimension, now is the time to correct them.
- Snap a chalk line to mark where each row of shingles should be installed. This helps make sure rows are straight. Be sure to offset each set of shingles so vertical seams do not match.
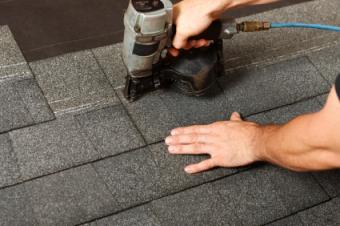
- Start installing shingles from the bottom of the roof. Use galvanized nails to hold each shingle in place. Most shingles come in three tab sets, meaning that each section appears to be three shingles.
- Overlap each row of shingles according to the manufacturers directions. Be sure that the next row of shingles covers the nail heads of the row that proceeds it.
- Use a roof cap to protect the final seam. Although some roofers make their own roof caps out of shingles, for the amateur it is best to purchase a pre-made roof ridge. The roof ridge should match the existing shingles, and can be put into place using roofing cement.
Be Prepared
Learning how to shingle a roof does not mean that you have the physical ability to complete this project. Many people are surprised at the manual strength required to finish the job. Purchasing a nail gun will help the project proceed quicker, but the asphalt shingles and roofing felt must be hauled into place before it is secured. If at all possible, plan on having help to complete this project.
Remember that roofs may have chimneys, eaves, dormers, skylights and other areas to work around. Take your time and examine the way these areas are treated first to help ensure you do them correctly. When in doubt, contact a professional.


