Water leaks under a slab foundation can erode the sand, gravel, and soil base regardless of how well it is packed, creating weak areas that can cause the slab to sag and crack, even when reinforced by wire mesh or metal rebar. The result to the house will show up in drywall cracks around sagging doors and windows and, if left without being repaired for too long, can actually make the house an unsafe structure for habitation. It is best to catch this kind of problem as early as possible.
Signs of a Leak
Your first clue will usually be an abnormally high water bill. You can check your water meter (take a reading, wait a few hours, then take another reading) to see how serious a leak might be. Check all the faucets and fixtures in the house. A running toilet, a leaking pipe inside a wall, or a faulty faucet connection can equally be the cause of an unusually high water bill and are sometimes easy to overlook.
Eliminate these possible problem areas before assuming there might be an under-slab issue. Even professional builders and plumbers have made the mistake of digging into a slab before verifying some other source of leakage, so be certain to check all other sources thoroughly.
Supply Line Leaks

For a supply line, there are obvious signs to look for:
- A damp spot coming from under the floor
- A particularly warm or cold area of the floor (depending on whether it is a hot water or cold water supply that is leaking)
- The sound of water running underneath the concrete floor.
If you can hear the sound of running water, know all your accessible sources are in good shape, and can gauge your water meter to show increasing use, you can be fairly confident of a leak.
Find the Leak
Locating the actual problem spot requires careful listening through the concrete floor. One way to narrow down the area is to acquire a decent stethoscope from a medical supply store with which to listen for sounds of running water through the concrete. Professionals will often use a device called a geophone, which is a high tech (and somewhat more accurate) version of a stethoscope.

Running water will create a "vibration" of sound through a large area, much the way sound echoes through a cave, so be sure to listen for the loudest source of noise. Take your time and be as certain as you can before deciding where that loudest point occurs.
Access the Leak
Once you have decided on where the leak probably is, you can drill a hole in the concrete with a hammer drill, using at least a one-inch drill bit, to confirm your estimate. You may want to go ahead and call a professional at this point, though, rather than drilling in to your home's foundation on your own.
Water will flow to the point of least resistance, so if you have picked your spot well, water should well up through the hole from the leak due to supply line pressure alone.
Drainage/Sewer Line Leaks
Outgoing lines offer a different challenge. In this case, there is no consistent water pressure and the leak only occurs during the drainage that occurs from taking a shower, flushing a toilet, washing dishes, etc. For drainage leaks, always call a professional.
The most common practice among professionals is to locate and close off the main sewer line, then pull a toilet that is farthest from that closure point. The toilet drain is then filled with water until it reaches nearly floor level. If that water level goes down, then there is likely a leak in the drains under the house. The speed with which the water level goes down will tell you how bad the leak actually is, faster drainage meaning a larger leak.
Find the Leak
Locating the actual point of leakage in a drain line is difficult if you are not a professional. Usually, a plumber will attach a remote camera to the end of a sewer "snake" and run it through the lines until he can see the leak point on a video monitor. Otherwise, searching out the drain leak requires that you know where the lines are under the slab and doing a separate test of each individual drain to find the one that drains the most quickly, then digging up a considerable portion of floor before finding the actual damaged area.
Fixing a Leak
It is not advisable to try to repair an outgoing drainage/sewer leak yourself under any circumstances - this is simply not a do-it-yourself project. If that is the type of leak you have, it is best to call a professional.
Supply Line Repair
It is also probably in your best interest to call a professional for supply line repairs as well, as they involve cutting into your home's foundation and performing pipe repair or replacement, all of which require specialized skills and can result in further damage if not done correctly.
If you decide to do a supply line type of repair yourself, the steps you will need to follow include:
- Determine the location of a supply line leak following the instructions above.
- Shut off the water at the meter.
- Pull up whatever floor covering is over the area, clearing a spot slightly larger than the area of concrete you will expect to remove. Usually, a two foot square hole will suffice, although you might make it as big as three feet square for ease of access.
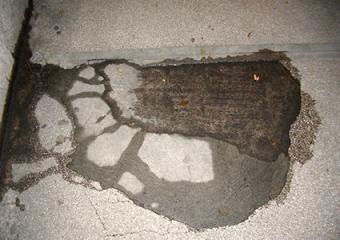
- Use a small jackhammer or hammer drill to cut open an area of the concrete floor to expose the pipes. You might also need a Sawz-all or metal shears to cut away any metal mesh or rebar in the way. A typical slab is four to six inches thick, so expect it to take some time.
- There will also be some digging involved, as the pipes are typically one to three feet underground, depending on the depth of the frost line where you live, to prevent damage from freezing in the winter.
Repair Considerations by Pipe Type
Repairing the section of pipe depends on whether it is galvanized iron, copper, or CPVC (different from PVC in that CPVC is specifically designed for water supply lines).
Galvanized Pipe
Older homes (typically from the '60s and '70s) probably have galvanized pipe, which creates an entirely different problem from copper or CPVC piping. Galvanized pipe is prone to corrosion, so repairing a leak is possible, but leaves you open to the possibility that more leaks will develop over time. In this case, it is best to abandon the galvanized pipe and re-pipe the house using copper or CPVC lines run through the attic.
You will probably want a professional to do this, since he can perform the work more quickly and efficiently.
Copper Pipe
If the offending pipe is copper, you will need to cut out the section that is damaged and, using joining sleeves and a length of copper tube of appropriate size, solder the new piece into the existing line.
CPVC Lines
If the broken line is CPVC, you will need to cut out the damaged section and replace it with appropriately sized sleeves and pipe, gluing it with PVC cement.
Testing the Repair
Once the repairs have been made, turn the water back on and pressure test the repair before filling in the hole. If all is well and the repair is holding, then you should remove any wet soil, which will cause the ground to settle as it dries. Cover the pipe with fresh, dry dirt, then a significant layer of sand and pea gravel, packed down, to create a stable surface for the cement fill.
Next, pour in sufficient concrete to fill the hole (you may want to replace the wire mesh/rebar first, but that is an optional step), level it off, and wait for full curing of the material. Typically, it will take a week to ten days for full curing to occur before you can replace whatever flooring was over the area.
Seek Professional Assistance
Unless you are a die-hard do-it-yourselfer and willing to engage in the effort involved, you will probably want to call on an expert plumber to locate and repair leaking pipes under a slab. You can save some effort on his part if you do all the checking to be certain of a slab leak up front, so that when you call you are reasonably sure of the problem. However, the plumber will likely double-check your endeavors anyway, due to the difficulties of the job and his liability concerns.
Cost Expectations
Typically, the cost of this kind of repair will run from about $2,500 to $4,000, depending on where you live and the type of repair involved. Check with your homeowner's insurance company to see if they will cover some or all of the cost.
In many cases, they will cover everything but the actual pipe repair (usually about $150 or $200), unless you need a complete re-piping due to the presence of galvanized pipe, which may not be covered unless you can negotiate coverage with the insurer.
Wait Before Making Interior Repairs
If there is interior damage to the house (drywall cracks around doors or windows, etc.), you should wait a few months before trying to make repairs in order to assure that there is no further settling of the slab due to the pipe repair work. If there is still damp soil drying out or you live in a high water table area, further settling may occur.


