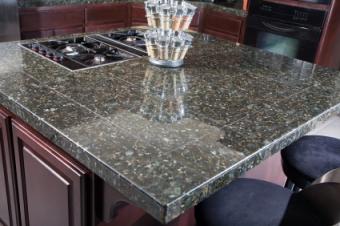
With varying color, grain patterns and textures, granite countertops enhance any kitchen design. Unfortunately, they may also be out of reach of many homeowners due to their extreme expense and weight. If you love the look and feel of granite counters, but can't get a slab for your kitchen, consider installing granite tiles on your countertop instead.
How to Install Granite Tiles On a Countertop
Installed properly, granite tile countertops have the same attributes as granite slab counters; they are scratch resistant, burn resistant, highly durable and beautiful with natural variation. However they weigh considerably less than granite slabs, which makes them easier to manipulate and install yourself.
Preparation
Like all tile installations, granite tile countertops require the right substrate for installation. While it is possible to install your granite tiles onto plywood, the best material for the job is 3/4-inch cement backerboard.
Cement backerboard will not swell or expand if moisture from your sink penetrates the tile, which will help preserve your counter for longer.
- Remove the old countertop completely and clean the top edge of your cabinets.
- Lay out the backerboard sheets right on top of the cabinets and use a level to ensure they are even. If necessary, slide small plywood shims beneath the backerboard to level it. Keep the sheets 1/8-inch apart from one another and away from the backsplash wall.
- Screw the backerboard right to the cabinets using 1-1/4-inch backerboard screws.
If you are planning to install a tile or decorative edge to the front of your counters, cut the backerboard down to 1-1/4-inch strips and screw it to the front edge of the counter area to give you enough space to install the facing.
Installation
Granite tiles install very similarly to other tiles, with the counter area acting like any other horizontal substrate.
Materials
- Measuring tape
- Chalk line tool
- White, latex-additive thinset mortar
- Trowel
- Tile wet saw
- 1/16-inch grout spacers
- Beating block
- Rubber mallet
- Level
- Impregnating sealer
- Foam paintbrush
- Soft cloth
- Unsanded grout
- Grout float
- Grout sponge
Instructions
- Break your counter into sections, treating each run of cabinets as its own, separate area.
- Measure each section and find the centerline. Snap a chalk line from front to back on each of the centerlines to mark them.
- Dry fit the granite tiles right onto the counter without mortar to determine the best fit and placement of the tiles.
- Lay the first tile at the front of each counter section, directly on the chalk line so the line bisects the tile from front to back.
- Lay the next tiles evenly out to each side. This will place cut tiles on the edges and back of each section, with full tiles in the front, center section. Use tile spacers if necessary to help keep your tile lines straight. Do not butt the tiles up against one another; while granite tiles appear to be square, most have subtle variations in size that will result in an uneven tile job if you do not separate them by at least 1/16-inch.
- Cut the tiles to fit the counter on a tile wet saw and double check their fit in the dry layout with the other tiles.
- Remove the tiles from the counter in the opposite order you set them down in and stack them nearby, marking their former position on the counter as you go so you can return them to the precise location during the install.
- Spread a small amount of white, latex-additive thinset mortar onto the countertop. Smooth the mortar onto the backerboard with the flat edge of the trowel, then key the mortar by raking the notches through it in one direction until the mortar is a uniform depth.
- Set the granite tiles into the mortar in the same layout you determined during the dry fit. After laying down two or three tiles, set the beating block on them and tap it gently with a rubber mallet to drive the tiles evenly into the mortar.
- Place a level on top of the tiles and check to ensure they are even and that no corners stick up higher than the surrounding tiles.
- Continue installing the tiles until the counter is covered. If you plan on installing granite tiles on the front edge, do so at this time.
- Let the mortar cure for 24 hours.
- Paint a coat of impregnating sealer onto the granite tile with a foam paintbrush. The impregnator will both help to protect your granite from stains and act as a grout release, making the grout clean up easier.
- Allow the impregnator to penetrate the tiles for 10 minutes, then buff away the excess with a soft cloth.
- Mix up unsanded grout to a consistency of runny peanut butter and scoop up a small amount onto the end of a grout float.
- Use the float to direct the grout into the joints between the tiles. Hold the float at a 45-degree angle to the tiles and push it into the joints from several angles to ensure good coverage. Turn the float to 90-degrees to remove the excess grout from the surface of the tiles.
- Allow the grout to begin to cure for 10 minutes, then lightly dampen a grout sponge and work it in circles over the tiles to clean them.
- Allow the grout to cure for an hour, then buff the tiles with a soft cloth to remove any remaining grout haze.
- Let the grout cure for 24 hours before using your new counter.
Installation Tips
To make your granite tile counters look the best they possibly can, follow these tips during installation.
Mix Your Tiles

Granite is a natural stone, which means that it will vary from piece to piece and from lot to lot. Because a granite slab will have more consistent variation over its surface than granite tiles will, you may need to arrange your tiles during the dry fit to get the best possible look. Take tiles from several boxes at a time as you arrange them to get even variation. Try to arrange the color variation of the tiles to appear natural; don't leave a dark tile surrounded by a sea of light tiles. If you have a tile that is out of the ordinary, use it for cuts or edge tiles, instead of installing it front and center.
Bullnose Your Edges
There are many different ways to finish a granite tile counter. These include:
- Using a wooden molding
- Using a granite chair rail tile
- Using a ceramic edge tile
- Using a granite bullnose tile

Of these options, bullnose tiles look the most like granite slab counters. A bullnose is a gently rounded edge that makes a transition from the top to the facing of the counter. You can bullnose the front edge of the front row of tiles to curve gently down. Install the facing tiles just below this, allowing the bullnosed area to hide the unfinished edge of the tiles below them, making a smooth transition.
Bullnose blades are available for tile wet saws at most home improvement stores. Replace the blade on your wet saw with a bullnose blade to shape the edge before polishing it:
- Unscrew the nut holding the blade in place on the side of the saw.
- Remove the nut and slide the blade off.
- Install the bullnose blade and replace the nut.
- Place the tile to be shaped with its edge lined up with the curved section of the bullnose blade.
- Turn on the wet saw and push the tile into the curved section of the blade. Keep the saw going as you pull the tile back toward you, then push it into the blade again. You may need to push the tile into the blade several times until you get the desired curve on the edge of the tile.
- Polish the tile's edge after it has been curved with an angle grinder fitted with a polishing pad.
- Clamp the tile to a table's edge and run the angle grinder back and forth over the edge of the bullnose tile until its surface is identical to the top of the tile.
Blend Your Grout
The biggest drawback to a granite tile counter is the need for grout. Grout is a cementious material made to protect the edges of your granite tiles and prevent moisture from getting to the cabinets below them. Whenever possible, select a color for your grout that will blend in with the background color of the granite. A good rule of thumb when selecting your grout is that actual grout dries one shade lighter than plastic or paper grout samples; choose a sample that is just slightly darker than your granite tile for the most invisible once installed.
Purchasing Granite Tiles for Counters

While there is a lot of stone on the market sold as "granite" for use on countertops, the vast majority of it is actually commercial granite. This means that while it contains high levels of quartz, feldspar and silica, the stone may actually be any number of other materials, such as a dolomite, quartzite or gabbro. All of these materials can be used on a countertop, but some will require higher levels of maintenance and care than others.
If you are unsure of what the material you are considering actually is, or what its maintenance level is, use the rule of thumb that the lighter the color of stone you purchase, the more maintenance it will require, and do the lemon and oil test on a sample tile before you purchase.
The Lemon and Oil Test
With the exception of gabbros - black granites - all granite tiles will require sealing and some degree of maintenance. You can determine just how much maintenance by requesting a sample tile from the manufacturer and pouring a small amount of lemon juice and a small amount of oil onto the tile.
Let the lemon and oil sit on the tile undisturbed for one hour, then wipe it away and examine the granite. If the stone has dulled where the lemon juice was sitting, or darkened where the oil was sitting, it will require frequent sealing and very gentle cleaners to maintain. If the stone has not dulled, or darkened, it is fairly low maintenance and will only require periodic or yearly sealing.
Where to Purchase

You can find granite tiles at most home improvement centers, but their selection may be limited. To get the most selection, you have two choices: visit a fabricator near you to view the slabs and request tiles of your favorite stone, or order online. The following retailers have large selections, and competitive prices.
- MSI: MSI has a nice selection of both exotic and common granites. They showcase the most frequent variation you can expect from a specific stone so you can see how comfortable you are with it before you buy.
- Floor & Decor: The selection is more limited at Floor & Decor, but their prices on more common and popular granites beat what you can find at most home improvement stores.
- Menards: You'll find a decent selection of different sizes of popular granites which can help you minimize grout joints.
Make the Most of Your Counter
Granite tile countertops install in just two days, and can transform the look and feel of your entire kitchen. Consider installing granite tile counters in your kitchen and see what new look it brings.


