Adding a bathroom as part of a basement remodel is a great way to add some extra functionality to the space. Putting in or remodeling a bathroom in a basement is in many ways identical to working on a bathroom in another room of the home. There are a few key issues, though, to consider that will help ensure the job gets done right.
Preparing for a Bathroom Remodel in the Basement
Like any remodel, basement bathrooms have several preparation steps that must be done before it can take place.
Pulling a Permit
Putting in or remodeling a bathroom is a job that requires a building permit and inspection. If you are using a contractor or plumber as part of your remodel, they can help you take care of this. Otherwise, pay a visit to your city hall to apply. You may need to submit detailed plans of the remodel, or just list the work being done depending upon the scope of the job and your city's laws.
Planning the Project
Most basements are water-ready, which means it's generally no trouble to place fixtures like toilets, sinks and showers in any area. As you plan your remodel, take the time to either speak to a contractor about building codes, or get a list of codes from your city hall. Many bathroom remodels -including those in basements - must include specific distances, such as a minimum of 15-inches from the centerline of the toilet to a wall or fixture, or 10-inches from the centerline of a sink. Keep these measurements in mind as you select fixtures for your new bathroom.
Plumbing Selection
Basement bathrooms may be unique in one sense from other bathrooms in the type of plumbing and fixtures you may need to use. In most homes, bathrooms above grade use gravity to pull water and waste to sewer or septic lines. In a basement, however, you are often below grade and need to push these things up.
This may mean relying on pressure-assisted toilets that use up to 50 pounds of water pressure to propel waste and water up to the sewer lines. It may also mean adding a water pump if your system requires it.
If your basement floor is a slab, you may also have to rely on back-vented toilets and tub and shower drains that remove water through the walls, rather than drilling through the floor. Speak to a contractor about whether or not you can dig through the slab, or if you will require rear-venting fixtures.
Material Selection
Materials for a basement bathroom are very similar to materials chosen for other bathrooms. A few concessions may be needed if your basement tends to have high moisture levels. Products like natural stone that absorb moisture may not be the best choice in a very humid basement. Instead, look for materials and products that do well in wet areas such as:
Porcelain
Ceramic
Glass
Quartz
Solid-surface materials like Corian
Acrylic
Fans and Lighting
Basements are notoriously dark, and most basement bathrooms do not have any natural light. Plan on putting in both an overhead light and task lighting above the vanity and in the shower. Put a fan that vents to the outdoors in the overhead light to help dry out the bathroom whenever it's in use.
Beginning Your Remodel
Once you've selected and ordered all of your materials, wait for everything to arrive before you begin the remodel. Open each box as it comes and check to ensure that all material is accounted for and correct. Take care of any problems before you begin to avoid wasted downtime later. Once your materials are in place, you or your contractor can begin the remodel.
Vapor Barriers
Basements are notoriously damp, and bathrooms in general also have high levels of moisture. Therefore, it's very important to take the time to put down vapor barriers on all areas of the finished bathroom. This includes applying plastic sheeting to the stud walls before you finish them, and to the concrete before it is tiled.
Leveling the Floor
Basement floors are often fairly uneven with high and low points from the settling concrete. If you plan on putting in mosaic tile, this isn't a problem, but anything larger than 2-inches will be subject to cracking if the floor isn't perfectly level.
Apply a self-leveling floor compound to the cured concrete before you put down the vapor barrier. The compound will seek out high and low points on the floor and level them. Once it dries, apply the vapor barrier and the floor tile.
Putting in the Plumbing
In most cases, your plumbing pipes are easily accessible in the basement, allowing you to put your fixtures exactly where you want. If you are unable to dig through the concrete for drains, your drains will run on top of the floor and out the back of the walls. The pipes are hidden by special raised skirts on the tub, shower floor and toilet.
Take care of the plumbing after you have leveled the floor, but before you finish it or the floors; you will need to leave some spaces to tile around.
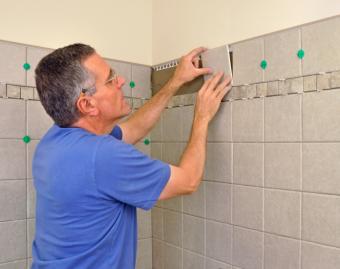
Finishing the Shower Walls
If you're adding a shower in your basement bathroom remodel, you have a few options to choose from. Once you put in a vapor barrier and finish the walls, you can put in a three-piece acrylic unit. Acrylic units are great for basements because there is no grout to absorb moisture and breed mildew over time. If you choose to install one, put cement backerboard behind it to help further protect your walls from moisture.
If you choose not to use an acrylic unit, you can still tile the walls. Put the tile in over cement backerboard and use a water-resistant grout such as epoxy to help it last longer. Avoid any shower tiles that are moisture sensitive, such as crazed or crackled finished ceramic or stone, which will require a lot of sealing to help them stay clean.
Finishing the Bathroom Walls
Whether you plan on tiling your bathroom walls or not, try to avoid putting drywall in your basement bathroom. The high humidity levels will just breed mildew over time. Instead, use a cement backerboard designed for tile and paint. You can tile to wainscot height or leave the walls bare and paint it like drywall. It's not affected by moisture the way drywall is, so your bathroom has a better chance of lasting.
Finishing the Bathroom Floor
To help your bathroom floor keep looking good, consider tiling it in the largest size tile you can put in the space. Larger tiles have fewer grout joints, which means fewer places for moisture to infiltrate. Tile the floor area beneath the vanity or sink, as well as beneath the toilet around the waste pipes. This gives you greater freedom to change these fixtures down the road without worrying about matching the footprint of the old ones.
Finishing Up
Once your finished walls and floors are in place, install the fixtures and the visible plumbing. Consider adding some heated towel rails to help dry things out, otherwise put in several large towel rails to give towels a space to spread out and dry easily in the humid space.
Plan on an inspection once you're done to close the permit. You may want to have your plumber on hand to answer questions for the inspector, or have him write you up a note of what he did and what valves he used, as the inspector may need to know before you he passes you.
Enjoy Your Bathroom
A bathroom in your finished basement is a great investment in your house. Pay close attention to the small details that make it different than other bathroom remodels, and enjoy your finished work.