Whether your kitchen decor is country, vintage, art deco or modern, a tin backsplash will certainly add character to your kitchen's theme. Besides the aesthetics this type of metal backsplash offers, it's also easy to clean and it is safe to place behind a stove, as tin withstands high temperatures.
Patterns and Styles
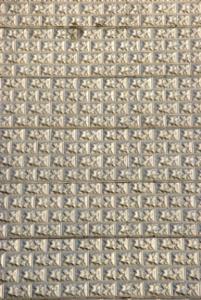
The durability, easy maintenance and versatility of tin makes it a popular material for kitchen backsplashes. It is sold in a variety of patterns, colors and finishes. Tin can be painted or powder coated to match your kitchen's decor. Tin tiles or panels with an embossed pattern or motif are known as pressed tin. Patterns embossed onto tin can range from simple geometric shapes like diamonds, to elaborate designs like fleur-de-lis or other floral decorations.
Tin Backsplash Sheets and Tiles
Decorative tin is sold in pre-cut tiles and sheets (also called panels). If you buy sheets you'll need to cut them down to size with tin snips of a guillotine cutter. Sheets are easier to work in comparison to individual tin tiles, as the patterns for the tiles are imprinted onto the metal. If you buy individual tiles, you'll need to accurately measure the backsplash to determine how many tiles you'll need. Depending on the size of the wall to be covered and the size of the tiles, you may have to cut a few individual tiles to get a proper fit.
Installating the Backsplash
Installation techniques for metal backsplashes vary depending on the existing wall surface and the tin manufacturer's instructions. The most popular way of installing a metal backsplash is to use construction adhesive. Some manufacturers recommend a specific brand, like Liquid Nails. Here are the basic instructions for installing tin as a backsplash:
- Measure the wall area to determine the amount of tiles or panels needed for the project.
- Cut the tin to size. Be aware that cut tin will have sharp edges.
- Be sure to cut a rectangular hole to accommodate for any outlets or light switches.
- Apply adhesive to the back of the panel or tile.
- Press the panel into place on the wall.
- Tape the panel or tile in place with painters tape until the adhesive is fully dry.
- When the is dry, remove the tape and seal the edges with caulk.
- For a finishing touch, use a decorative wood moulding around the edges of the backsplash.
Peel and Stick Tin Tiles
A quick and easy alternative to the traditional tin backsplash is to use peel-and-stick tin tiles. These tiles already have the adhesive bonded to the back of the tile. To install, simply peel off the paper backing to expose the adhesive. Press the tile onto the wall's surface so that the adhesive adheres to the wall. Installation techniques vary among peel-and-stick wall tile manufacturers. Be sure to follow the instructions that come with your self-adhesive tiles.
Cleaning Tin Tiles
Most tin backsplashes can be safely cleaned with a mild cleaning solution and warm water. If your backsplash has a painted surface or a special finish, be sure to follow the manufacturer's instructions.
Where to Buy
The material for this project can be found in most home improvement stores, like Home Depot, Lowes, or local hardware stores. The Internet is also a great resource for finding unique patterns and designs that may not be available locally. Here are a few retailers of tin backsplashes that are worth checking out:
- AmericanTinCeilings.com: This is the official website of the American Tin Ceiling Co, a company that specializes in decorative tin tiles for ceilings and backsplashes.
- Classic Ceilings: Based out of Fullerton, California, Classing Ceilings sells a variety of tin tiles in different embossed patterns and sizes.
- BrylaneHome.com: If you're looking for peel and stick tin tiles, Brylane Home's online catalog offers them in three finishes, silver, gold and copper.


