Making a chandelier is not nearly as daunting as it sounds. With a combination of materials found at most hardware stores and items from around the house, anyone with modest mechanical abilities and basic understanding of household wiring can achieve this DIY project -- the process for creating a mason jar light fixture mounted on a wagon wheel.
Primary Considerations
Ideally, you will locate your homemade chandelier where there is an existing light fixture in the center of a room. If there is no existing light fixture, consult with a licensed electrician about getting power to the place where you want to the chandelier to hang from.
The first step is to disconnect the power by turning off the switch for the existing light fixture. Then remove the cover and the bulbs. Light fixtures vary in how they are attached to the ceiling, but look for additional screws that allow you to remove the rest of the light fixture. Disconnect the light fixture wiring from the household wiring in the junction box above the light fixture and you're ready to go. You will install your homemade light fixture to the existing junction box in the ceiling that the previous light fixture was attached to.
Chandelier Materials
Most hardware stores carry lamp kits containing many of the parts below, but they can also be purchased individually.
12 - mason jars (mix of pint, quart, and gallon sizes)
12 - 1/8-inch lamp loops
12 - 1/8-inch lamp nuts
50 feet of 18-gauge lamp wire
12 - E12 candelabra sockets
Antique wagon wheel
24 - 1/8-inch by 2-inch screw eyes
100 feet of decorative lamp chain
Lamp canopy kit (with hook)
2 - large wire nuts
Tools
Wire strippers
Electric Drill
3/8-inch drill bit
Wire strippers
Wire cutters
1/8-inch drill bit
Pliers
Ladder
Step-by-Step Instructions
You can vary the length that each mason jar hangs from the wagon wheel as well as how far the wheel hangs from the ceiling. You can also vary the total number of jars used to your liking. But in general, the idea is to hang the jars evenly spaced around the circumference of the wheel so it is balanced. You may want to base the number of lights on the number of spokes of the wheel you are using. The instructions below are based on a chandelier with 12 mason jar lights.
Prepare the Mason Jars
The first step is to turn each mason jar into a light fixture.
Use low-voltage candelabra bulbs.
Drill a 3/8-inch hole in the center of the lid of each mason jar.
Push a threaded 1/8-inch lamp loop into each hole and screw a 1/8-inch lamp nut onto the bottom of each loop (the nut will be on the bottom surface of the lid).
Cut 12 pieces of 18-gauge lamp wire into the following lengths: 36, 39, 42, 45, 48, 51, 54, 57, 60, 63, 66 and 69 inches.
Strip the wire sheathing back 3/8-inch on one side and 3/4-inch on the other side.
Thread the ends that of the wire that are stripped back 3/8-inch through the opening in each lamp loop.
Connect the wires to the terminals of each candelabra socket. Make sure the positive wires are connected to the positive terminals and vice-versa.
Screw an E12 bulb into each socket and screw the lids into the jars.
Connect the Jars to the Wheel
The second step is to string the jars from the wheel using lamp chain.
Drill an 1/8-inch hole in the bottom of the wheel near the location of each spoke.
Screw an 1/8-inch by 2-inch screw eye into each hole.
Cut 12 pieces of decorative lamp chain into the following lengths: 6, 9, 12, 15, 18, 21, 24, 27, 30, 33, 36 and 39 inches.
Pry open the end link of the shortest section of lamp chain using pliers. Close one end of it around one of the eye hooks on the bottom of the wagon wheel and close the other end around the lamp loop with the shortest piece of wire coming from it. Connect the jar with the second shortest wire to the wagon wheel with the second shortest chain segment. Connect the remaining jars to the wagon wheel in the same manner, matching the relative lengths of the wires and the chain.
Thread the wires through each of the links of each chain.
Connect the Wheel to the Ceiling
Install the bracket of a lamp canopy kit to the existing junction box in the ceiling (kits vary, follow the instructions provided).
Drill an 1/8-inch hole in the bottom of the wheel near the location of each spoke.
Screw an 1/8-inch by 2-inch screw eye into each hole.
Cut 12 pieces of decorative lamp chain into segments 24 inches long.
Pry open the ends of each segment and close one end around each screw eye and the other end around the hook of the lamp canopy.
Thread the remaining ends of the wires through each of the links of the 24-inch chains and through the hole in the lamp canopy.
Twist all the positive wires together with the positive wire from the junction box in the ceiling inside a large wire nut. Repeat the process with the negative wires. (you will need a helper to stand on a ladder to support the chandelier close to the ceiling while you stand on another ladder and connect the wires).
Attach the lamp canopy to the bracket, following the instructions provided with the kit. Flip the light switch and your new chandelier should be working
Variations to Consider
Once you get the idea, there are an infinite number of variations you can come up with to customize the project based on your particular style and the materials you have to work with. Garage sales, flea markets, craft stores and your attic or basement are great places to look for objects that could be re-purposed as a chandelier.
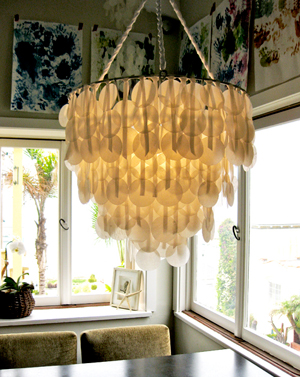
Chandelier made with craft store trinkets
Use a bike wheel as the support structure for the chandelier.
Beads, sea shells and old jewelry are great materials for decorating a DIY chandelier.
The mason jar idea can also be modified to work with wine bottles.
Elegant Illumination
Traditional chandeliers are often seen as symbols of wealth and regality, but these days many people just see them as an outdated part of interior decor. Making your own with re-purposed objects is an easy afternoon project that will result in a chandelier with striking and contemporary character.


