
The kitchen backsplash is the last component of the kitchen design. While it does help to keep the wall behind the counters and stove clean, its primary purpose is to be decorative and complete the kitchen's style. The backsplash area is also unique because it is one of the only areas in the home where any material or design can be installed.
Selecting a Backsplash Tile Material
Backsplashes can be covered in any material from glass to stone. Because the wall does not get walked on and is not subjected to large amounts of water like a bathroom shower, any material at all can be used there. Some materials do have special considerations in regards to maintenance and installation, however, which may affect the final decision.
Machine Made Ceramic Tiles
Machine made ceramic tiles are one of the most inexpensive and basic materials for backsplashes. A machine made tile has a clean, straight edge and flat profile. They come in a range of colors and sizes, but are most commonly found in white and cream and in sizes such as 4-inch, 6-inch and 3 by 6-inch.
Machine made ceramic tiles are easy to install and require little in the way of maintenance. Their design possibilities are limited, but they can be combined with other materials such as glass to create unique designs.
Handmade Ceramic Tiles

Handmade ceramic tiles vary tremendously by manufacturer. Some are relatively uniform in size and shape, while others are extremely warped and may not lay flush to the wall. Handmade tiles frequently come in a very wide range of colors, shapes and sizes and may include special decorative tiles like borders or decos.
Handmade tiles can be more difficult to install, because they are so frequently uneven in size and shape. This means they will have a larger grout joint, and may require back buttering, or additional mortar applied to their backs. to lay flat on the wall. Handmade tiles are also prone to crazing, or cracking of the glaze over time, which means the tiles will need to be sealed to prevent staining.
Porcelain Tiles
Porcelain is an extremely durable material made out of compressed clay dust that has been fired to a high temperature. They come in multiple styles including tiles that look like stone, leather, fabric and metal.
Porcelain tiles most often come in larger sizes such as 12-inch, 18-inch or 24-inch. Because most backsplashes average about 18-inches in height, this can produce a very modern look with few grout lines. Porcelain requires no maintenance and is fairly easy to install.
Glass Tiles

Glass tiles come in a wide variety of styles, shapes and sizes. There are, however, essentially two types: color backed and transparent.
Color backed glass tiles have the color painted onto the back. They are typically smooth on the surface and edges and even in size and shape. They install more easily than transparent tiles because they do not show imperfections in the thin set behind them. They are more difficult to cut, however, because any chipping to the tile is extremely obvious.
Transparent tiles are more likely to be handmade and have variation in color, texture and size. When held to the light, they can be seen through, which means that special care must be taken with the setting materials to prevent discoloration of the glass.
All glass tiles require special setting material to help bond them to the wall. All glass tiles will also dramatically increase the appearance of light in the kitchen. Glass can be mixed with other materials to create unique designs.
Slate Tiles

Slate is a metamorphic stone made out of layers of compressed mud. It comes in a wide variety of colors, and can be found with a natural cleft finish or a smooth, honed finish.
If the slate tiles are "un-gauged" they will vary in thickness from piece to piece and within one piece by as much as 1/4-inch. This makes for a very inexpensive and beautiful tile that is also extremely difficult to install. All tiles must be back buttered to provide a smooth, even surface on the wall.
Slate is very easy to care for. It should be sealed prior to grouting to help make it easier to clean. A color enhancing sealer will help bring out some of its variation and beauty. Slate rarely stains, although it can be very dusty and flaky for up to three months after its installation. It is not a good stone for those with allergies.
Marble Tiles
Marble is a calcium based, metamorphic stone made from limestone. It is hard enough to take a high polish, or to handle the "tumbling" process of being turned in a drum with sand, rocks and water to produce an antiqued finish.
Marble tiles come in a variety of colors, sizes and finishes, all of which work well in backsplashes. A marble backsplash does require sealing on a regular basis and some marbles may etch or stain on contact with acids such as lemon or tomato juice.
Travertine Tiles

Travertine is a type of limestone formed deep inside hot springs. It is characterized by the appearance of multiple holes in its surface. These holes were formed by water vapor escaping as the stone hardened, and in some cases may go straight through the stone.
Travertine is rich, warm looking stone that works well in many kitchens. It does require sealing, and if the stone is purchased "unfilled" with the holes intact, the holes will need to be filled with grout during installation to help preserve the integrity of the stone.
Limestone Tiles
Limestone is a calcium based sedimentary stone. Pure limestone is white, and most limestones are light in color. Small shells and fossils may be visible in its surface. Most limestones are extremely soft and come in only honed and tumbled finishes, although some are hard enough to take a high polish.
Limestone requires frequent sealing in the kitchen and is highly susceptible to staining and etching.
Selecting a Backsplash Style
Each of the various backsplash materials can be installed, alone or in combination, to produce countless styles that can enhance many kitchen designs. To ensure you are choosing a design that works well with your kitchen, start by making choices that tie in with what's already there.
Take Cues from the Kitchen Counter

Most kitchen countertops are made up of several colors. Some of these colors may be small flecks in a slab or granite or quartz, or they may be more elaborate swirls. They also provide you with a built in palette and design for the kitchen.
Select colors for the backsplash that can be pulled from the countertop. An Uba Tuba granite top, for example contains cream, gold and turquoise in addition to its dark green and black. A backsplash can be made of either cream or gold or a combination of the two with or without a turquoise accent.
The pattern of the counter can also give you a clue into how busy the backsplash should get. Tightly patterned counters work well with decorative and elaborate backsplashes. Brightly color, patterned and veined counters, however, work better with more sedate counters.
Balance the Floor
If your kitchen floor is very light or very dark in tone, make sure your backsplash matches it to help provide some balance to the kitchen design. This is particularly true if you have cabinets or a countertop that provide a contrast to the flooring. For example, a tan floor with white cabinets and a dark colored counter will need a similarly toned backsplash to prevent the cabinets from getting too stark.
Create One Focal Point

If you worry about the backsplash area getting too busy and overwhelming the rest of the kitchen design, select one focal point to concentrate the design in, and keep the rest in a simpler pattern.
For example, many backsplashes have a large area behind the stove that can be framed with chair rail tiles to draw the eye. The interior can be filled with decorative tiles, glass tiles or even just a different pattern of the rest of the backsplash tiles, herringbone while the rest is subway for example, to focus the eye. Keep the rest of the backsplash in a plain tile or a plain tile with a border running through it that matches the chair rail or decorative tiles in the framed area.
Use Similar Lines
If you have a kitchen with lots of clean lines and contemporary finishes, keep the backsplash the same; use lots of clean lines. Oversized tiles to avoid multiple grout lines, or mosaic tiles to create a random pattern will also work in this style of space.
A kitchen that has a lot of decoration, though, with a stone floor, carved cabinets and rich details can handle more variation in the backsplash. Use stone, terracotta or handmade ceramic tiles to match the detail already in place.
Three Popular Backsplash Styles
Depending on the type of kitchen, and the type of material you choose, you can adapt any of these popular designs to fit your space. If you need help downloading the printable patterns, check out these helpful tips.
Tumbled Stone Kitchen

Tumbled stone kitchens have been used for decades for their rustic look and natural elegance. Newer designs incorporate multiple shades of stone mixed together, such as Rosso Asiago, Travertine Noce, Travertine Chiaro and Lagos Azul in one area. Mix it up by using a mosaic blend of the same stones behind the cooktop.
This design works best in:
- Tuscan kitchens
- Farmhouse kitchens
- Rustic kitchens
- Transitional kitchens
Polished Marble Kitchen

The sleek, cool lines of polished marble tiles add an elegance to any space. Mix it up by using an unusual stone such as onyx, Alba Chiaro or Blue Celeste, and use 12-inch tiles, rather than smaller versions.
Install the tiles by laying a full tile against the counter, with a half tile above it. On the next row, use a half tile on the bottom with a full tile on top. Keep alternating as you go for a sleek design with few grout lines.
This design works best in:
- Modern kitchens
- Contemporary kitchens
- Loft kitchens
- Formal kitchens
Mixed Materials

One of the most classic backsplash materials, the subway tile, gets an update when it's mixed with stone, glass or decorative tiles. Install the subway in a traditional running bond - offset - pattern, but insert a decorative border one tile up from the counter. This could be a row of glass mosaic, glass subway tiles, stone mosaic or a decorative ceramic tile.
Fill in the area behind the cooktop with the decorative tile and frame it with a chair rail that matches the subway tiles.
This backsplash works best in:
- Modern kitchens
- Transitional kitchens
- Eclectic kitchens
Installing the Backsplash
The backsplash is the last component of the kitchen to be installed, because the kitchen is completely functional without it. This means that many homeowners can take their time determining what tiles they want to use there, and even install them themselves.
Materials
- Measuring tape
- Chalk
- Tile wet saw
- Thin set mortar
- Trowel
- Grout
- Grout float
- Grout sponge
Instructions
- Measure the height and width of each separate section of the backsplash.
- Mark off an area on the floor of the same height and width as each section.
- Locate the center point of each of those sections on the floor and on the wall and mark them with chalk.
- Lay out the tiles on the floor to help determine the final pattern they will be installed in.
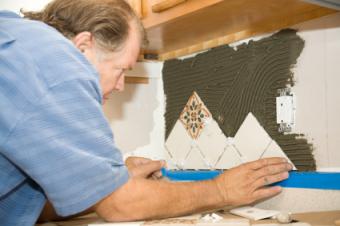
- Set the first tile in the bottom, center of each section so the chalk line bisects it and it sits slightly above the counter.
- Set the next tiles up and out from this one evenly to create a balanced installation.
- Cut any tiles to fit on a tile wet saw and return them to the dry layout to make sure they fit.
- Spread a small amount of thin set mortar onto the wall. Key the mortar by raking it with the grooves on the trowel until it is all an equal depth.
- Press each tile into the mortar firmly in the same pattern you determined on the floor.
- Wait 24 hours for the mortar to dry.
- Grout the tiles by spreading the grout over them with a grout float held at a 45-degree angle to the wall.
- Turn the float to 90-degrees to scrape off any excess grout from the surface of the tiles and direct it toward the grout joints.
- Let the grout dry for 10 minutes, then wash away any excess grout with a slightly dampened grout sponge.
Installation Tips for Different Materials
While installation is mostly the same for all backsplash materials, some tiles require a few extra steps to help make the installation look its best.
Stone tiles
Seal all stone tiles prior to grouting them. This includes slate, marble, granite, limestone and travertine. Let the sealer set for 10 minutes before wiping it away.
If you are installing tumbled stone tiles, use a wide grout joint to help make up for any size irregularities between the tiles.
Glass Tiles
Use a white thin set mortar that has been modified with latex to help it expand and contract. Smooth out any grooves in the glass before pressing the glass into place to help prevent shadows.
Use caulk in all the corners of the installation to help absorb any movement that the glass cannot.
Uneven Tiles
Lay out several tiles at once and make a note of which ones are lower than the others. Add additional mortar to the tiles that are lower to help even them out in size. Beat all the tiles into the mortar with a rubber mallet to ensure an even installation.
Take Time Making Your Decision
Remember that the backsplash does not need to be installed with the rest of your kitchen for the kitchen to be functional. It is not uncommon for homeowners to take up to a year after a kitchen remodel to decide on their backsplash material and design. Take your time making your backsplash decision to ensure you are making the best one for your space.


