
If you want the charm of an eat-in kitchen with extra storage, but every inch is prime real estate--create a kitchen banquette. This old-style, spacesaving feature is making a major comeback.
What to Consider
Here are a few pointers to consider before you start building a kitchen banquette:
- Don't build it in the middle of the primary traffic flow - for example, the path between the refrigerator, stove, and sink, or the main entry to the kitchen.
- Decide on a shape for the banquette - curved, round, L-shaped, U-shaped, or two benches flanking a long table. Use a bench and table only, or add more seating with stools or chairs.
- Plan on seating four-to-six people in approximately 200 square feet of space.
- Tabletops average 29 to 31 inches high. The table can be separate from the seating or secured to a raised bench structure.
- Since it's a prime eating spot, choose fabrics that clean easily, or design your banquette with removable cushions and washable slipcovers.
- Costs will vary depending on the structure, but if you have it built by a remodeling contractor, budget $2,000 to $3,000. If you do it yourself, provided you have all the right tools, you'll save $500 to $1,000 on that amount.
How to Build a Basic Banquette
Obviously, planning to build a kitchen banquette in a new home is easier than when doing full or partial kitchen renovation. Nevertheless, you can easily modify a space where the old table and chairs used to be, especially if you can run the seating bench along an existing wall.
Step 1: Make some decisions
Decide things like the height and depth of the seat before you dive into the project. Test out a few options using stools, boxes and favorite chairs to find what's comfortable for you and your family. Most banquette benches are between 18-22 inches high (including cushioning).
Step 2: Measure and Frame
Take the framing measurements for your space (measure twice; cut once). Level the framing with shims and secure the 2x4s into wall studs with screws to ensure stability. Don't forget horiztonal support boards.
Step 3: Measure and Clad
Take measurements again before cutting the plywood cladding. Select a good-quality plywood and use finish nails to affix plywood cladding to the framing.
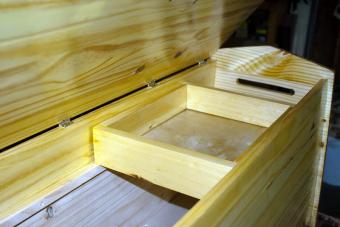
Tip: If you are planning to use the banquette for storage as well as seating, first remove large sections of the top face cladding to create openings (leave a 3 inch lip on the wall side). These plywood pieces can be hinged to create a door or left as separate pieces that are removable to access storage.
Step 4: Hinge lids (if desired)
Most people choose to hinge lids for ease of use when accessing the storage spaces. Use long "invisible" piano hinges for a streamlined style or cost-effective millwork hinges for a rustic look.
Step 5: Finish the edges
Add some simple trim pieces with tiny finish nails, such as quarter round, to finish off the plywood edges and fill in the nail holes with spackle for a flush surface.
Step 6: Prime and paint
Find a paint color that complements your kitchen. Your finished banquette should either match or harmonize with your existing millwork.
Tip: High gloss is a more durable surface finish than egg-shell or semi-gloss (and you can easily wipe it down).
Design Variations and Bonus Features
Stained Wood
Instead of painting a banquette, consider constructing the faces out of a quality wood and staining them.
Drawers
It's easy to substitute cupboards or drawers for a hinged door. Frame in cubbies or clad the the seat box accordingly to add prefabricated doors and drawer fronts.
Seat Backs
To design a more formal seating banquette, consider building seat backs alongside the benches. Seat backs can vary in height, based on your preference so find a good precedent. The typical range for a banquette seat back is 36 to 48 inches. Include comfy back pillows or upholster the seat backs in a coordinated fabric.
Contours and Corners
If a banquette is to be contoured instead of straight, or is designed for a uniquely shaped space, make a template out of cardboard first, then adjust the primary pieces accordingly.
Fancy Trimmings
Instead of quarter round along the edges, take it up a notch with more detailed molding. A hinged door can be trimmed with an ornamental end cap and the border of the banquette might be trimmed with crown molding. The vertical faces of the banquette will pop with textured millwork details like beadboard.
Cushions
Seat cushions can be made from all formed foam, foam and spring, filled with hemp fiber, or a number of other options. Its a good idea to ensure the pillows and cushions have removeable covers. This is a dining area, after all, and things could get messy.
Welcome to the Table
Building a kitchen banquette is a great weekend project with results the whole family can appreciate. Get everyone involved by collaborating together on the design--kids can help choose the fabric, pitch in with the painting and serve up the snacks. Organize all the ideas by sketching out some basics before you take that trip to the store and you'll end up with a smoother process start to finish. Whether the banquette is destined for weekend entertaining or busy midweek dinners, a day or two of hard work is a small price for all those cozy meals to come.


